Showing posts with label therapeutic art. Show all posts

Friday, March 20, 2020

Spring is Challenging this Year


Spring is officially here but this year we, along with the rest of our world, are facing a great many challenges.

We are starting a period with some common challenges to those faced during winter isolation and we need to try and take care of ourselves. I live in Manitoba where our northern winters often lead to a lot more time spent indoors as well as increased isolation. Cabin fever is real. People start to stay home more because of the weather, and some of us do not respond well to the lack of light, and as a result, we stay home even more. People might even show signs of Seasonal Affective disorder and Depression or other health-related issues.


Social distancing, self-isolation and actual quarantine are necessary and are occurring all around the world right now. Fear of illness and loss and financial loss are real issues. People are concerned and afraid that they might not have the necessities of life such as milk for their kids, prescriptions and even toilet paper. How this will all evolve with time is unknown and a lot about what is ahead for us as individuals are genuinely outside our control. All this adds up to massive stress and many concerns for us personally and for our world. Things have rapidly changed.

What we need to look at now is what we CAN do. How can we address our physical, emotional, social and spiritual wellness? We need to think positively and plan actions for what we can do for our families, our communities and ourselves.

I want to use this blog to start sharing ideas for Leading A Healthy Life during challenging times. I also plan to share more simple projects and ideas suitable for individuals and families, children, people with special needs. I also want to give support to all those fantastic people, like my co-workers, who work with older adults.


I am huge on personal goal setting! I think it is more critical than ever right now, and it is also essential to set up a routine. It might be quite a flexible plan, but still, a reason to get up and do the activities that keep you and your loved ones healthy and keep your mood elevated. 

What I want you to focus on is creating two different lists. 

Get yourself out two pieces of paper and label them:

  1. TODAY (no matter what time of day it is right now)
  2.  THE NEXT 5 DAYS

On the today sheet
  • Just make some decisions about what YOU need to do.. and check them off as you do them. Heck, give yourself stickers if you want to. Decide what is for dinner, if that is your responsibility today, and when you want to serve it. When are you taking your medications, when are you taking time to meditate or do yoga? Decide if, for today, it is okay to watch TV programs as a marathon. Decide on bedtimes. Decide what time to set your alarm clock for tomorrow. What else is on your mind?

On the 5-day sheet 
  • Consider reaching needs outside your home. Do you need to order anything? Do you need to go to work? Do you need to contact people and cancel any commitments? Do you have plans to help others in your community during this crisis?
  • Consider the people who live with you. Do your kids need home study supplies, do they need to practice their instruments, or perhaps want to take up a new hobby. Do you need to set up an online meeting for anyone? Do you need to review your plans for your Kids TV and online time? Do you need to set aside quiet time with a loved one just to be together? How about having a family meeting about how you might handle your meals and snacks with the current changes in living, Decide who gets to feed the cat or walk the dog and when?
  • Consider your own needs. What do you need to happen in the next five days, JUST FOR YOU! It might be an exercise plan; it might be daily phone chats to keep in touch with your friends? Do you, like my youngest daughter, find baking relaxing and want to look for new challenges in your cookbooks? How about some tea time, or time for music, or relaxing in a bubble bath?

I am going to go now and work on my new hobby, watercolour painting. It helps keep me calm and happy.


Take good care of yourself!


pictures in this post courtesy of Pixabay


Sunday, February 3, 2019

Art Project::Watercolor And Snow Themed Meetings


Winter is a game changer in Winnipeg. We complain about how cold it is but we feel proud about how we press on with our everyday lives no matter what. It is cold and we adjust, we put on boots, drink hot beverages and plug in our cars so they will start. We embrace it. I wanted to do an art project at work that reflected winter and I decided to to go with Snowflakes.this year. I started by spending two theme-related sessions leading up to the art project.

The first program involved talking about the cold weather we are experiencing and then moved on to reminiscing about what they recall about winter fun and work. I asked about, shovelling snow, going sledding, skating, riding snowmobiles! I heard several people wishing they had taken the time to build snowmen. We talked a bit about global warming and how shorter warmer winters might beof  some benefits and there also might be some problems.

My second snow themed activity involved more individual and small group visits. I looked up a lot of pictures of close-ups of snowflakes on our department laptop. Little videos showing how a snow crystal grows proved to be particularly interesting. We talked about how many arms a flake has and how awesome they are. We speculated if it was true or not that there are no two snowflakes the same. I particularly like using the information and pictures on http://www.snowcrystals.com

For Art Day I wanted to use watercolor techniques which is something we don't do very often. I like tape resist projects and used strips of painters tape over water-color paper. The paint was inexpensive paint dry disk sets. I attached the paper to the table with the tape. It kept the projects from sliding around and at the same time, it gives a nice kind of matting around the art. We used bigger brushes and I encouraged the use of lighter colors to suggest a snowy day but any color was fine.

The only really note worthy change was that I rotated the paper as the session progressed. That made it easier for people who don't have a lot of reach with their arms and to encourage people to cover that whole page with color.

The pictures dried quickly and then we had the fun of pulling off the painters tape to reveal our designs. I like to back art with poster board pieces to show off the work, make it look a little more finished and to make the paper sturdier and lie flatter.

Our Artists were quite thrilled with their final results.

Friday, September 21, 2018

Recycled Burlap & Boxes Make Useful Storage Solutions

This has been a very long summer. I finally got out to the cottage and I really wanted to keep busy but not of the more active projects were a good possibility for keeping me out of trouble. No painting the outside of the cottage? No helping with the new Dock? Sigh.  I do love crafting though and did a few projects with the grandkids one weekend and I began working on crocheting an afghan.

I have a wire rack behind the door of the washroom at the cottage. Storage is at a bit of a premium in there. Every time someone slammed a door the little sample shampoos, and extra lotions and insect repellant slid out of the side and onto the floor. My craft starved brain went wait! We can solve this!

I do like projects made from recycled material.


First, I hate to spend more money than I must and second, I am always working with groups that have few resources, so I am always stretching to find cheap, or better yet, free projects! I always look to find projects that are good looking and if possible useful.  My little question when deciding about projects for Girl Guides/ Scouts was always would the family keep this around for a couple months or does it go straight in the garbage. I also wondered "how much stuff can one family attach to a fridge?"
I thought I would try for a solution to my Washroom door slaming problem, make a way to sort out some arts and craft supplies since I was feeling particularly crafty and make a vase for extra points.

This container project is something that was common years ago with youth groups and thrifty homemakers!  It has a bit of a vintage feel but that tends to be how a lot of recycled material projects start off. Vintage is fun. What makes it more current are the colour choices and details that you choose.
It is very flexible for materials.  I was thinking of Fall at the cottage. right now, so that influenced my colour and texture choices. I am also thinking about the various places my new box containers, my new vase and my new art supplies holders are going to be displayed.

I literally dug through the weekends recycling and came up with some cans from soup and spaghetti sauce and some crackers boxes. We had some twine in the storage room and a bit of white craft glue and some extra tacky glue.  I also had a $3 roll of burlap out here because I was planning on making table decorations for a family Fall dinner or perhaps Thanksgiving dinner at the lake. There was plenty to spare.

First, I tested out my various sized boxes to find one that would fit properly on in the shelves and then I cut the height to the correct size for my location. By this point, I was all excited and planned out what to do with even more of my garbage! grin This is such a flexible project!

I was thinking about putting on a base layer of acrylic paint on my future container. I wanted to add paint to the boxes in particular to kind of seal the paper in case a little soap or lotion came off in the container  Regular acrylic paint  is not the greatest when sticking on aluminum cans so my husband Bob said he had an almost empty bottle of black spray paint and offered to just take the items outside and give them all a coat of paint on their inside and the outside. Yes!

Once the boxes were cut to size I moved on to the cans.

First, I took a metal file to the cut edges just to make sure there were no sharp edges and that nothing would catch.


Next, we got everything painted. The colour peeks out a bit from behind the twine or burlap so it is not the prominent colour you are seeing. I am in a fall mood, we have a lot of black in our cottage, and we had that left-over paint, so my colour choice was simple.  It would be fine in whatever colour you wanted to use. In the summer I would probably go with white or yellow or blue for the cottage!
Once it was dry from being painted I put a bit of tacky glue down the side of the box or the can and just wrapped it around and carefully overlapped the end where it joined up and then I used a bit of extra glue there to secure it.  That simple.

 I did line up the finished bottom edge of the burlap strip on the bottom edge of the container and I folded the excess at the top of my containers to the inside and used a lot of glue for that. I liked the look of it wrapping over on the box top edge and the height of my box worked with the width of the burlap but if the box was taller I would not have worried about wrapping it over the edge
.
To keep everything in place while it dried I used clothespins. - yes, I use clothespins out here. In fact, that is one of the things that are kept on that bathroom shelf.  Binder clips and the big paper clip would have been useful too if I was at home in my office.  I suggest wiggling your clips loose before it is totally dry. The glue is soaking through the fabric and holes and will attach to your clip to your box or can!


The twine wrapping project is just as easy.
I would suggest using a softer twine since some types can be quite harsh and hard on your hands. The one we had in our storage room was perfect.


Prep your containers the same way and then add a bit of glue at the starting point start (I started at the bottom) and begin wrapping, around and around and around. Add the glue on to the container as you go and try and have the glue run all the way up. It is okay if it isn't all glued down so I used just a line along the side seam of the tin can and just pushed it in place as I looped it around the rest of the can. The finishing off can be a little tricky. Try and fray the cut edge a bit so that it is a bit flatter and tuck it under the edge of the previous row. It is not cheating to use a hair dryer to speed up drying in heavy glue areas. 

I wanted to add some extra embellishments to my containers, so I tied some twine around it. There are so many things you could add like lace, ribbon or fake flowers or leaves to the side to make it extra cute.


Give this project a try!


Make it your own.  I would love it if you let me know if you try this project at home for your self, with your youth group or your seniors!


EXTRA   HINTS

• This project is simple to do, if somewhat sticky with the glue. Consider
precutting the boxes and the burlap to the right size before doing it with your group. Give a variety of embellishments to your participants so everyone has a unique finished product. The repetitive nature of wrapping the twine
around might be very calming for some individuals. This would be challenging for people with limited use of a hand. I wonder how well double stick tape would work for getting everything in place.


• Yarn around the jars, cans or boxes does work but be aware that most kinds of yarn stretch a bit when wet. They also shrink down again as they dry. The motto of the story is to take it easy on the glue and if it is getting soggy don’t try and pull it  too tight.


• Consider this project for Earth Day!

Friday, February 9, 2018

Art - Pour Painting with Girl Guide Friends


My Painting.
My local Area for Girl Guides of Canada  had a "Pour Paint" evening for adult members.

What a fun night! One of our members, Janet, figured it out by watching videos on line and then experimenting and figured it out! She was kind enough to organize this evening and share this skill with us. We had about 21 people get together and we followed directions and it was amazing to see the results. It was more fun to do than I expected, and most certainly more exciting too. I was also surprised how much harder it was to control the color and outcome of the picture but still they all looked amazing. It was also a lot tidier than I expected. The tables and floors were covered with plastic and tarps on the floor, and we were all warned to wear clothes we didn't want paint on. Sure the tables had a lot of drips on them but no major spills and there didn't seem to be any paint on the floor.

I want to try it again, and I will take pictures of the process, but that can wait for better weather when I will try it outside. I was originally hoping this would be something I could do at work or with my Stroke Recovery Art group but I really think I will need to experiment and see what modifications I can make in the procedure to see if this would be a possibility. The cost would be kind of high for a small group too. Janet estimated that the cost was about $10 a person for our bigger group. Maybe it will work with smaller canvasses and fewer colors of paint.

Basically what we did was choose about 6 or more colors of acrylic paint and these were each added to individual cups along with a thin layer of a paint flow liquid.  If needed we added drops of water so it was thin enough to pour in a stream off of the popsicle stick mixing stick. It should not be dipping in globs nor should it be very runny.

Next we put  a bit of one of the paints into a bigger disposable cup and added a couple of drops of silicone type lubricant. Janet recommended little bottles of this stuff called treadmill oil that is usually sold near treadmills.  Just keep layering until the cup is full.

Next we inverted out canvas over the glass of paint and holding on tight flipped them. Full upside down glass on top of the canvas. You slide it around for a second and then lift the cup! TADA. Tilt the canvas around and let the paint roll around to develop the pattern and colors and be sure to get to all sides and let it pour off the edges.

Rest your painting on a paper plate to lift it off of the table and give it at least an hour to set up before you try and move it, but it will probably take over a day to set because the paint is extremely thick.

The acrylic paint dries as a flat color and it really looks best with a clear gloss spray coating or clear paint on sealant.

Below are a couple pictures of other participants work. Aren't they awesome?


Saturday, December 2, 2017

Centerpieces Made at Art Group

We  had a guest come to the Stroke Recovery Association of Manitoba Art Group this week to show us how to make centerpieces.  Teresa, is the wife of a Stroke Survivor and she was happy to share her talents with us. Her family had a flower shop when she was a girl and she still really enjoys working with fresh greens. She came with everything needed fur us to make our own centerpieces. She spent many hours gathering supplies and preparing by wrapping picks onto pinecones and a few artificial berries to be used as picks in the arrangements we were creating. Trimming the greens and making bows were difficult for a few of our group members but we all supported each other and we all wound up with georgous arrangements.


You start with a small bowl and a piece of green Oasis floral foam and n you push a candle into the center. Next we trimmed some pieces of pine greenery into manageable pieces and pushed it into the Oasis all around the arrangement. Our top layer was pieces of cedar. The two kinds of greenery gave a  much  greater depth and variety of color and shape that was very attractive. Next we added the trims.. pinecones, artificial berries, mistletoe, holly and we made or were given ribbons on a wire that can be poked into the Oasis foam. A few people even added a cute artificial bird!


My daughter Emily came along to art this week to give a helping hand. Its always nice to have her with me. We made one centerpiece together, that we now have on our coffee table.  Teresa said we can expect the centerpieces to last all the way into January.

 I want to thank everyone who came out for this event. I especially want to thank Teresa but I also want to give a big thanks out to the volunteers and family members that assisted in making this workshop such a success
.


Wednesday, August 30, 2017

ART- Trip to the Park


My Art Group from the Stroke Recovery Association of Manitoba wanted to try a few things this summer that we can't do very easily in the winter. One of the activities we picked was a trip to a the beautiful Leo Mol Sculpture Garden located in the Assiniboine Park.

The nine of us took a quick walk through the English Gardens and then we went into the sculpture garden. Most of our group had never seen this part of the park before and were surprised at  how big and beautiful it was. We all appreciated the benches and beautiful views located along the way. The park staff was just starting setting up for this evening's huge fundraiser Garden Party and it was interesting to see the place change for this very fancy party as the staff set up tables and displays. I wish I could have afforded to go in the evening and enjoy
the final product!

It was perfect weather, warm, sunny, with a bit of a breeze. and we just enjoyed the lovely displays during these last lovely summer days. We followed up by returning to the restaurant located nearby. The wait for the restaurant was the worst thing about the outing. It was over an hour before we got seated at a table and we had worries about getting to eat before the pick up times for some of our people who use our local handi transit system. It all turned out but if we do this kind of an outing next year I think we should bring a picnic lunch!

It was nice to be outside and see such beautiful plants and art. It was a pleasure to spent the day with our group. 

Special Thanks to my husband Bob for coming along and supporting us.

Thursday, April 27, 2017

Sharing New Ideas Here

I would like to start  sharing more of the resources and different projects I do with my art groups and some other therapeutic recreation interests on this blog.

I have felt very uncertain about putting actual programs up on the blog. It is a little bit unnerving somehow. Leading a Healthy Life is and always will be about my personal journey and the things I feel passionate about.  I have shared a lot of personal information here over the past nine years since I started this blog on the advice of my occupational therapist.

I keep thinking that I should open some kind of professional themed website or blog for the purpose of sharing recreation therapy ideas and local resources and yes, I do get asked once in a while if my projects or programs are on line for others to get ideas. I really don't want to divide my blogging efforts between two spaces but I have been a bit hesitant to let professional colleagues have access to my umm... vulnerable side which I occasionally share here.

The other side of the issue is that I think the programs I can share would be useful for some of the people who already visit this blog. People who have experienced some major life changes, caregivers and some of my friends might be interested too.

I have worried about this for a long time now and have finally worked it through in my own head. I am comfortable in who I am and I can own the experiences I have had. I have gone through a lot of ups and downs but I still keep going and the times when I have not coped well just show I am human and need support. That is not something to hide but something to be proud of.

I am looking forward to sharing some new posts with art projects, theme ideas and resources as well as more of the healthy living and therapy ideas I learn about on this journey.


Thursday, April 2, 2015

Key to Happiness - Truly Brave

Thursday, April 2:

 Key to Happiness

What do you think is the key to happiness? Is it being able to overcome a hard time? Laughter?
Maintaining a positive attitude? Tell us what you think and why. #HAWMC


I absolutely love this topic!

 I have spent a lot of time trying to figure this out. I have tried meditation, I have taken up hobbies and looked at so many ways to find the key to happiness myself.  I have attended a variety of workshops and eventually I got guidance from a life coach, Deb Dunn who promotes  laughter yoga, playshops for adults and encourages looking for JOY.


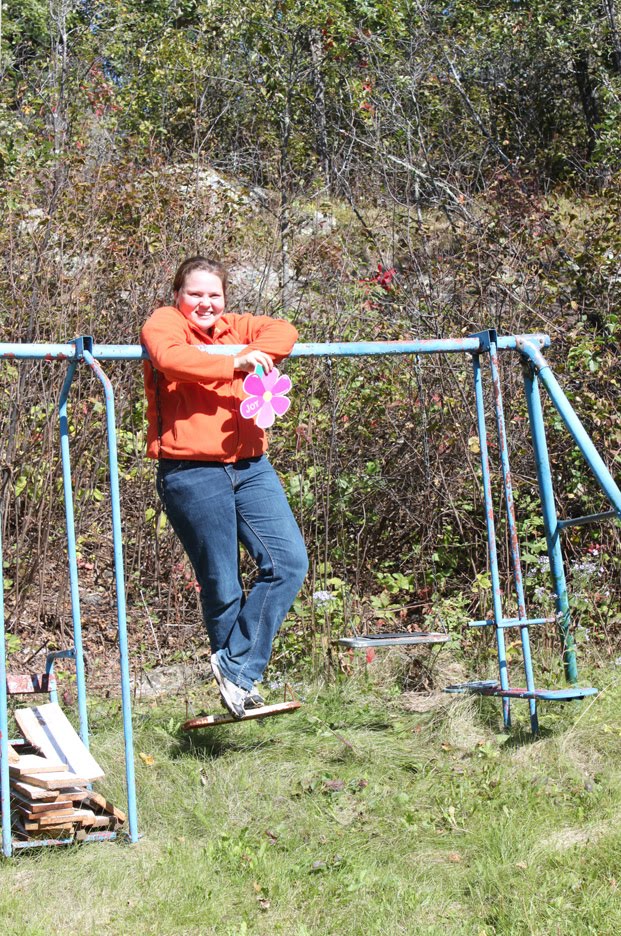
A pink paper Joy flower that I move around from time to time.
 
My daughter took my Joy flower and demonstrated fun for me.
 
I think my natural inclination is toward being a happy person (or I would not be singing crazy songs around campfires with Girl Guides and training to become a Recreation Therapist) but I have also experienced a lot of overwhelmingly sad times where I  found it very difficult to move forward with life. Lets face it, sometimes life can be really awful and as we experience these hard times we need to be sad and mourn for what we have lost. Some people become lost in the pain and the sorrow and have trouble finding their way out. The challenge is how to find a sense of  joy once again. 

I think we have to start with defining happiness. We all  know it when we are feeling it but what is it? Happiness can be defined as satisfaction with life and experiencing more positive emotions than negative ones. This can be very elusive state of being. Happiness or sadness impact your physical and mental well being, and that of those around you. It affects your ability to think, work, parent, sleep make choices and really just about everything about how you interact with your world.

Our Recreation Therapy courses including learning about the benefits of physical activities and mental stimulation but a big part of the training also consisted of learning how to meet all the needs of the individual. A recreation therapist tries to look at 6 different domains of life which are the cognitive, emotional, physical, social, spiritual and sometime vocational domains. This is considered holistic health and looking at the person as a whole results in an increased ability to bring health, peace and satisfaction to their life and yes, even happiness.

Todays blog writing prompt asks if  the key to happiness in being able to overcome
 a hard time. No I don't think so. Overcoming a hard time might give you pride and might make a difference in your circumstances but the sense of accomplishment is what is really making all the difference,-- It is an internal sense of personal value.

 I think happiness is not so much something to pursue as something to be open to. In the hard times you need to look for those moments of joy. You need to look for the adorable puppy, the smiling face, the sunny day. You need to be a person who look back on your life with forgiveness and remembers the happy moments. You need to be realistic and accept the bad things that have happened but you don't need to dwell on what that was like. You need to smile, sing, laugh, dance, hug, think new ideas and be a friend. You need to look for Joy and embrace it when and where you find it.

Here is the power of FUN!
Please look at this great video that features young cancer patients. When peoples lives are changed by an illness or injury what we need is to claim back bits of normal life, normal play!

Cyndi Lauper and Sara Bareilles, combine their songs 'True Colors' and 'Brave' to produce a song to raise money for the fight against pediatric cancer.


Related Posts Plugin for WordPress, Blogger...