Showing posts with label horticulture. Show all posts

Tuesday, July 14, 2020

My Herbs of 2020


I keep trying to grow herbs. I have them indoors, outdoors, at the lake, in the city and even at work in the Personal Care Home. I love how beautiful and fragrant they are and, potentially, how useful as an ingredient when cooking.  I believe that many herbs have great healing properties and can be very nutritious and good for you, but that is not something I have ever studied. I do know that the act of growing and nurturing the plants is fun and also good for you.  It gives me joy just to play in the soil, handle the plants, look at the lovely flowers and leaves and smell all the different fragrances!

I really would love to have many kinds of herbs growing in the ground and coming back year after year, but I only have a couple. The light is not great or the area doggie free in most of my spaces, so I like to make good use of container planting. This year I have a couple of pots growing on my patio at home and they are so lovely and fragrant! Two of my coworkers are growing indoor herbs at work as a program with the seniors, so it is one of my big topics of the summer. I have herbs everywhere!


The pot below is my mixed one. It has some sage, sweet marjoram, and new to me,  two kinds of licorice plants.  I have seen and tasted wild licorice a few times but I have never grown any.


The next picture is a pot full of different kinds of basil. I had excellent success with basil two years ago so, this time, I thought I would get creative. This pot has Italian Large Leave Basil shown at the front. That is what I have grown before, and it was easy to grow and yummy. The one with the purple flowers is called Cinnamon Basil, and the one with the white flowers is called Spicy Globe Basil. It was flowering when we got it. It would probably do best if we trimmed off the flowers and encouraged leaf growth, but I am just loving the look of it and haven't talked myself into pruning it yet.


The most successful herb for us has been a mint patch that has been located outside our back door for over a decade. At one point, it got really huge, but with time, it has shrunk down and gotten spindly. Trees have grown much taller around it reducing the light and I am sure the soil got depleted. It has been banged around with its location beside the door and even abused a little by our dog who is very fond of sniffing it. This year we cleaned up that area by that side of the house and added sod but we still left a little square for the mint. We worked in some compost and it seems to have perked up to a reasonable size for our use, and big enough to share slips with a few friends. I warn everyone that it can spread like crazy, and you should put a collar or barrier into the ground around it in order to keep it where you want it and out of the rest of your yard.


We keep trying out different herbs at the cottage and we have real issues with rodents and birds eating them and some that we have put in the ground simple have not overwintered well.  I usually have a pot of parsley inside on the window by the kitchen sink and make good use of it and our little raised bed garden has a big patch of chives growing. I love how gorgeous the chives look with their pretty purple flowers and how they provide us with a great ingredient for cooking and salads all summer long. They also act as a good companion plant by acting as a deterrent and keep away some bugs and critters from the raised beds.


I really like telling jokes so here are a few for you.
 ..Not necessarily hilarious ones, but it is still all part of the fun!

A girl told me that she recognized me from the local vegetarian club, but I’d never met herbivore.
I’ve got a device to fetch futuristic herbs. It’s a thyme machine.

I saw a new book about cooking with herbs. It’s about Thyme.
I was going to send back my fish in a herb sauce at a restaurant the other night, but I wasn’t sure if it was the thyme or the plaice. (Hint: Plaice is a kind of flatfish)
I know someone who was habitually late until his doctor recommended sleeping in a herb garden. Sounds odd, I know, but now he wakes up on Thyme.
I used to work with a very wise herb gardener. He was well known for his sage advice.
Thought I’d purchase a tall herb plant but actually turned out to be tiny. No big dill 

I like to put coriander on my blended tomatoes. It’s "soup herb".

I went to a restaurant the other night and asked for something herby. They gave me an old Volkswagen Beetle with no driver.
😀

Wednesday, May 13, 2020

Cheerio Squares and Saving the Bees


My daughter, Emily, has been making this delicious little treat lately. We just love her No-bake Peanut Butter Cheerio Squares! (see the recipe at the bottom of this post)

 It all started with buying a box of Honey Nut Cheerios. Frankly, the big draw was that the packaging offered a free hat or free shirt, and they are offering free wildflower seeds to help save the bees. I am not an affiliate or anything like that. I am just a bit of a sucker for giveaways.

We have received our free seeds already and are waiting for our free hat. I do want to caution that even native plants should be used appropriately in the correct habitat. A plant that does well and is a normal part of our environment here in Winnipeg could turn into an invading plant species in another location. We intend to plant our wildflower seeds in a planter or plant pot and keep them more contained in our yard and do not plan to spread them out in the wild like by our cottage by the lake.

We really do care about the pollinators of our world. Bees, butterflies and other insects are needed to keep our agriculture businesses healthy and food on the table. 

I have done a very successful Recreation Program about honey and bees for work at the nursing home, and I think it is time to do it again. Talking about bees and insects is great for discussion and reminiscence. I will have to be careful not to do any projects that actually attract any bees to our patio area and too close to our residents. Still, we certainly can learn about bees and honey and what we can do to help. During May, I am doing programming focusing on butterflies. They are also a pollinator but can't sting anyone!

According to the Honey Bee Conservancy, there are 10 things we can do to help promote healthy bees for the future.

  1. Plant a garden for bees. This doesn't mean you have to buy a lot of extra plants but rather consider purchasing plants that support bees and other pollinators. I know one secret. Those are often the most attractive and fragrant flowers, which will make your garden or window box look beautiful.
  2. Go chemical-free. Look into an organic or natural way to take care of your plants.
  3. Become a Citizen Scientist. Help collect data and information that can be shared to get a fuller picture of our world.
  4. Provide trees. They provide nectar with the flowers and habitat for them too.
  5. Provide a bee and butterfly bath. That is basically a shallow dish of water with rocks in it for the insects to have a drink.
  6. Build homes for native bees. That could be providing undisturbed spaces or little bee homes filled with small tubes to be homes for certain types of bees.
  7. Give bees homes. You can learn about having your own hive or supporting other community organizations in beekeeping or preserving natural spaces for insect life.
  8.  Inspire the next generation. We can help teach children how to be good stewards of our world in the future. 
  9. Host fundraisers to support organizations that bring awareness
  10. Support local beekeepers and organization. Try buying local honey and wax products. I love getting local honey at my favourite farmers market, and it is always a welcome gift for friends.
                                           

Here are a couple little extra resources that I intend to use at work when we make our No-bake Peanut Butter Cheerio Squares!

Want to sing a song?

The History of Cheerios


And Finally, the Recipe!

No-Bake Peanut Butter Cheerio Squares

Ingredients:
  • 3/4 cup Peanut Butter
  • 1/2 cup Honey
  • 3 cups Cheerios
  • 1/3 cup chocolate chips (Optional) 
Method:
  1. line an 8 x 8 baking pan with parchment and parchment paper or foil 
  2. place the peanut butter and honey in a large pot on the stove or in a larger microwave save bowl.
  3. heat while frequently stirring until they are melted and thoroughly combined 
  4. remove from heat and then stir in the cheerios and, if desired, the chocolate chips.
  5. pour into your parchment or foil-lined pan.
  6. chill in the fridge for an hour or longer 
  7. cut into squares using a sharp knife. 

Notes:
If you want a different look and a chocolatey taste, an alternative is to melt the chocolate chips in the microwave and spread them on top of the chilled mixture like you would frosting. Let it set before cutting.


#savethebees
#beethesolution

Wednesday, May 6, 2020

Growing a Garden with Catherine and Phil


Please welcome my friends and Guest Bloggers, Catherine and Phil. They love their little urban garden and I was so happy when they agreed to share about how they grow a Winnipeg garden.


Joyful Planting

During a pandemic, it can be scary; in order to live through these scary times, one should focus on keeping healthy and protect yourself by sanitizing and social distancing. It's not easy as I'm a frontline worker at a Personal Care Home. I have to be extra careful, but in my house, it's hard to do. We try our best to make sure everything is sanitary.

Our home consists of my husband Philippe, my fur babies, Buddy the cat and Bella, the dog and me Catherine. Phil has the green thumb of the family. Phil grew up in the country and worked on a farm as a young teenager. Myself, city girl, I have a little green thumb. I've watched my parents' garden, and they taught me how to care for plants inside and out.

 I would help put seeds in the soil, pick out the weeds, and water the garden every chance I got. However, if there was a bee or wasp around, I'd be running for my life, leaving the water hose running waiting until that bee goes away. I did enjoy watching our plants grow through the years, especially my parent's apple tree.

Phil and I planted a garden since the day we met 13 years ago and through almost ten years of marriage. Anyways, due to the crisis, the world is going through now why not take the time to plant a beautiful life in the garden, it's the best place to spend time with each other.

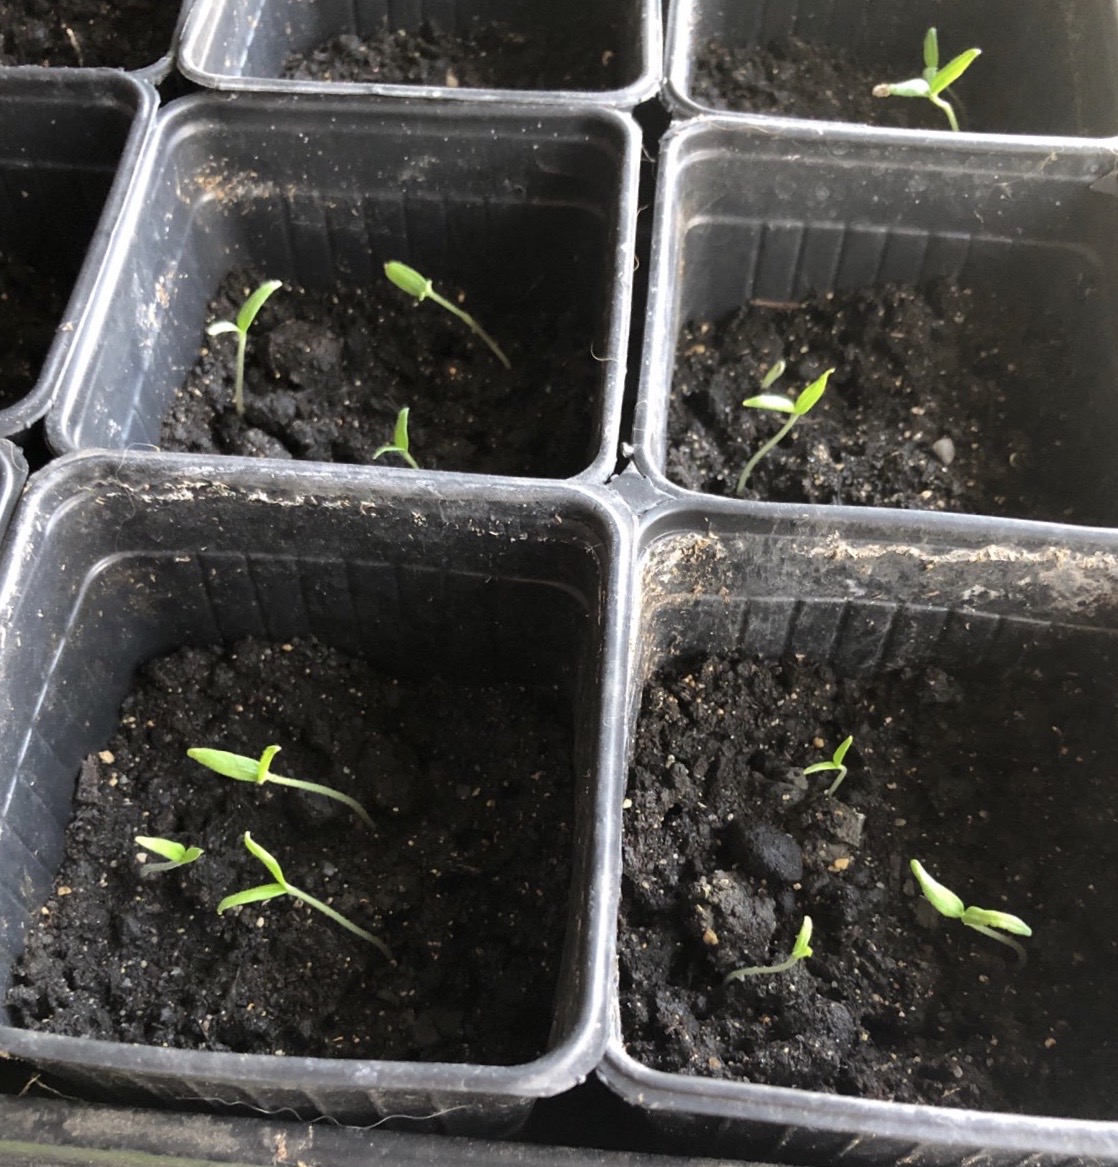
Phil searched on the internet and found a way to plant seeds in a Ziplock bag. All you need is a tray, spray bottle, scissors, soil, paper towel, tweezers, planting containers and planting seeds.
All you have to do is you take a paper towel that's been cut to the size of the ziplock bag, spray the paper towel lightly with water. Then fold your paper towel in half with the seeds inside and insert it into the Ziplock with delicacy. The next step is to have an area in front of your window that gets the most sunlight and leaving on a flat surface, or you can get a thick string with clothespins hanging it across your window. Let it sit there for 4 to 6 days, checking if the roots are starting to grow.


Then when you notice that the root is growing, use tweezers or your lovely fingers to lightly grab the seed with the root. With caution, plant the seed into 3/4 cup of soil in any plastic or recycle containers of your choice that have holes on the bottom. Dig a little hole in the soil to add your seed with root facing the bottom, cover lightly with soil and spray with water gently over the top. Add the seeds by separating them a couple of millimetres apart.


Then each day in the morning you should continue to spray it with water as it grows. Make sure you put your lovely creation by the window to get sunlight for your garden to grow. It has been a wonderful experience growing our lovely garden every spring.


As time passes, your plants will grow. Once the risk of frost is gone, it is time to transplant your plant into your outside garden. Take your container with your baby plant and move it to the garden.


Dig a hole approximately the same size of the containers and gently remove the plant. Insert the plant with all its wonderful roots into the new hole that you have just dug. It's ok if you take a lot of soil with you as sometimes it's gets stuck to the roots. Once inserted into the new hole in the garden, bring more soil to the new plant to make sure that it's nice and full in the hole. Add water, and enjoy watching your wonderful creation grow.


After a few weeks of watering daily, your plant will grow. With plenty of sunshine, water, love and even some great companionship, your plant will grow big and tall and eventually will create beautiful flowers.


If you are planting flowers, enjoy your beautiful creation with a wide arrangement of colours and, of course, the smell. Flowers can give out lovely aromas, and every flower has a different scent, so make sure to try many different varieties.

If you are planting fruits or vegetables, your flower after a few weeks will slowly start to create a little spot. The petals from the flower will fall, but don't be sad because that little spot that appears will continue to grow and, after some time, will grow into a fruit or vegetable. You can slowly watch all your hard work grow into some wonderful food that you can soon enjoy.


After a few weeks of watering daily, your plant will grow. With plenty of sunshine, water, love and even some great companionship, your plant will grow big and tall and eventually will create beautiful flowers.

Once the fruit or vegetables are fully grown, you can finally harvest. Remove with care and enjoy the fruit of your labour.


Sometimes your plant will die, and sometimes it won't grow, but don't be disappointed because that happens to all of us.

All plants have different aspects to them that help them grow better. We learn a little more every year on how to plant better, and with patience, love and care, we will slowly become wonderful gardeners, and that will help us go through life.


Story and Photography by
Catherine Molina-Ross and Philippe Ross


Thursday, December 7, 2017

Choir Concert Prize Draws

Bob and I have not been singing in the Scandinavian Choir this year.

The biggest problem is that choir is every Monday evening and I work every second Monday. Now that sounds like there was no time conflict but there sure was an energy conflict. The fact is that I really have to try and manage my energy. I do really well but one of the problems left over from my brain injury is still some ongoing fatigue. I really have to watch how I use my time and how much I do and that is not always easy. Now that I am having a lot of arthritis problems one of the things I am being told is to watch how I use my energy and to do things like use assistive devices.so here we go again! I am hoping to get better pain management soon and be able to keep on doing the things I love. Maybe we will be singing again in a month or next fall but I am not able to commit right now.

We went to the Scandinavian Choir's Christmas concert on Monday. It was a fun evening with our choir friends, enjoying some singing, dressing up a bit, food to eat and there were chance draws for prizes that the members donated.

We put tickets into every draw bag and were shocked when we won three of the draws! 

The first prize was a nice looking poinsettia plant.

Next I had my eye on an angel garden sculpture and sure enough we won that one too. I want to do more gardening both at home and at the lake so this little guy can be an inspiration. That draw also included  garden note cards and a small heart shaped picture frame.

The third prize pack include a red napkin holder, napkins, an Aloe Vera plant,  and a very pretty little necklace.
There was also a very nice set of Christmas towels for the bathroom but I am not so sure which gift pack it came with.

I love everything!


Monday, December 4, 2017

Planting Amaryllis


I love seasonal plants! They just make me happy!

Last week I got flower bulbs to plant both at home and at work.

I wanted to grow Amaryllis at work because it is such a large dramatic and fast growing plant. The kits are fairly reasonably priced for what you get and include a plastic pot, saucer, soil and a bulb. I gathered a group of about 7 or 8 residents and together we talked about Christmas Plants in general and we examined the bulbs which are pretty darn impressive and big. We planted it in the soil and watered it and I am crossing my fingers it grows fast. The window I put them in is not very warm. My plan is that once they get going I will take them visiting to many residents so they can watch them grow up. My aim is to have gorgeous flowers by Christmas or New Years.


I also had lots of fun planting Amaryllis and Paper Whites with my 7 and 11 year old grandsons.  They loved planting them and when they are over they are eager to water them and see what has changed. I regularly spend time with the older boy helping him with his academic skills. The December plan includes tracking the growth of the 4 Amaryllis plants and the two pots of paper whites including measuring them all weekly. We have worked on how to make a table on the computer where he can record the information and then in the end I will get him to average the different plants growth and graph his results by heights vs time . That is actually pretty challenging but it is gradual and hidden in so much fun that he will "enjoy the learning". 


I will post more pictures as they grow.


Saturday, December 2, 2017

Centerpieces Made at Art Group

We  had a guest come to the Stroke Recovery Association of Manitoba Art Group this week to show us how to make centerpieces.  Teresa, is the wife of a Stroke Survivor and she was happy to share her talents with us. Her family had a flower shop when she was a girl and she still really enjoys working with fresh greens. She came with everything needed fur us to make our own centerpieces. She spent many hours gathering supplies and preparing by wrapping picks onto pinecones and a few artificial berries to be used as picks in the arrangements we were creating. Trimming the greens and making bows were difficult for a few of our group members but we all supported each other and we all wound up with georgous arrangements.


You start with a small bowl and a piece of green Oasis floral foam and n you push a candle into the center. Next we trimmed some pieces of pine greenery into manageable pieces and pushed it into the Oasis all around the arrangement. Our top layer was pieces of cedar. The two kinds of greenery gave a  much  greater depth and variety of color and shape that was very attractive. Next we added the trims.. pinecones, artificial berries, mistletoe, holly and we made or were given ribbons on a wire that can be poked into the Oasis foam. A few people even added a cute artificial bird!


My daughter Emily came along to art this week to give a helping hand. Its always nice to have her with me. We made one centerpiece together, that we now have on our coffee table.  Teresa said we can expect the centerpieces to last all the way into January.

 I want to thank everyone who came out for this event. I especially want to thank Teresa but I also want to give a big thanks out to the volunteers and family members that assisted in making this workshop such a success
.


Related Posts Plugin for WordPress, Blogger...